How To: Convert Font to Vector Outline in Illustrator
Clients are welcome to create and submit their own designs or logos.
At Lyfe Pix, we welcome your unique designs or logos. To ensure quality, please convert all fonts to a vector outline before submission, using tools like Adobe Illustrator. This prevents misinterpretation of fonts in your design, ensuring it remains as you intended.
INSTRUCTIONS:
How to Convert Font to Vector Outline in Adobe Illustrator:
Follow these simple steps to ensure the text will be preserved as it was originally designed:
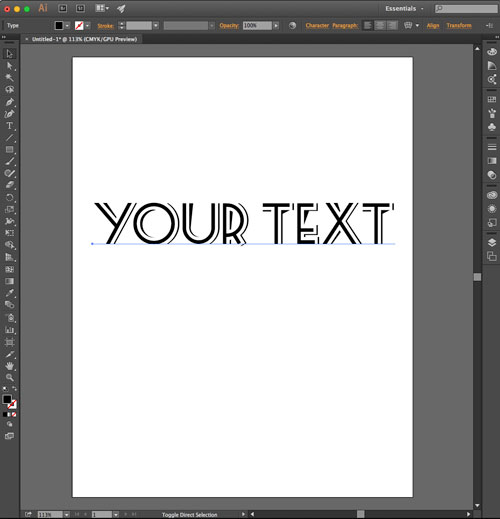
Step 1: Select the font you wish to use. Type the text in Illustrator using the Type Tool (T)
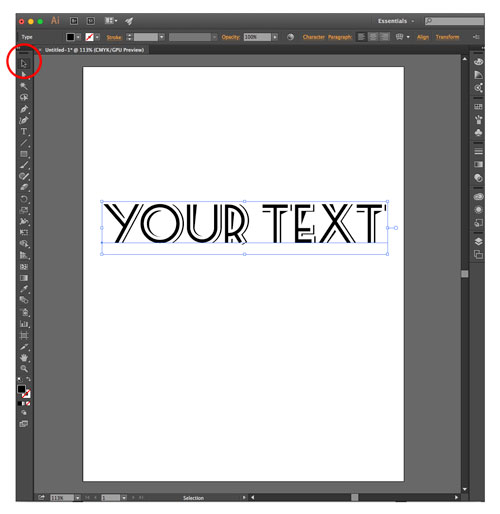
Step 2: Choose the Selection Tool in Illustrator (shortcut = “V”) and select the entered text
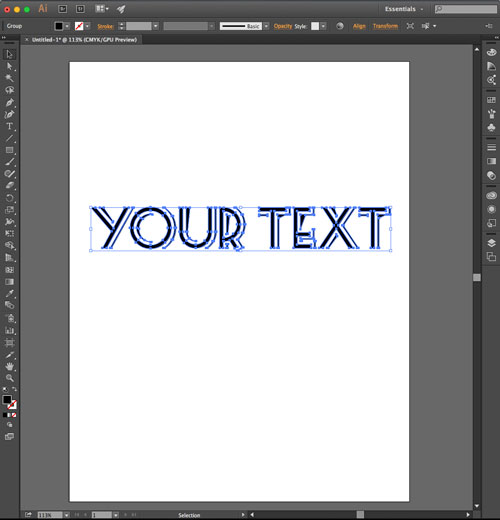
Step 3: With the text selected, click on Type from the top menu and select Create Outlines

All Done: Your final output should look similar to the image below. You have successfully converted your font into a vector outline.
Step 4: Save the file and submit the design/logo to Lyfe Pix.